

Ultrasonic Selfie
Say goodbye to double chin selfies, leaving Mark out of the group photo, and the dreaded extendable selfie stick.
Concept
You and some friends are at a gallery and want a group photo. Desperately you search for a passerby to take the photo, but no one is there. In a pinch you hold a phone at arm length and take the photo. The resulting image leaves a lot to be desired and you are seen with a dreaded double chin.
Ultrasonic audio signatures to the rescue!
We teamed up with local Boulder gallery Wonder Wonder to test the concept and aid with user research.
Role
Project Manager, Technical Supervisor, User Research
Skills Utilized
HTML, Java-Script, Arduino, Interaction
Duration
6 Weeks
How might we create a photo taking method that does not require an app download, Bluetooth or Wifi connection, nor phone specific cables?
The Problems
Taking ugly selfies.

Leaving Mark out of the group photo again!

Or even worse….

Research


Design Goals
User Needs
Patrons there with others need a way to take photos of the entire group.
Solo patrons need a way to take a photo of themselves while showing the entire space.
Product Necessities
Must not require an app download.
Must not place a high burden of connection setup on user.
Must work for every cellphone model today or in the future.
Must allow for resetting of process and for multiple photos to be taken without increased user interaction.
Arduino Beacon + Ultrasonic Audio Signature + Device Control via Webpage
=
Everyone can feel like a model.

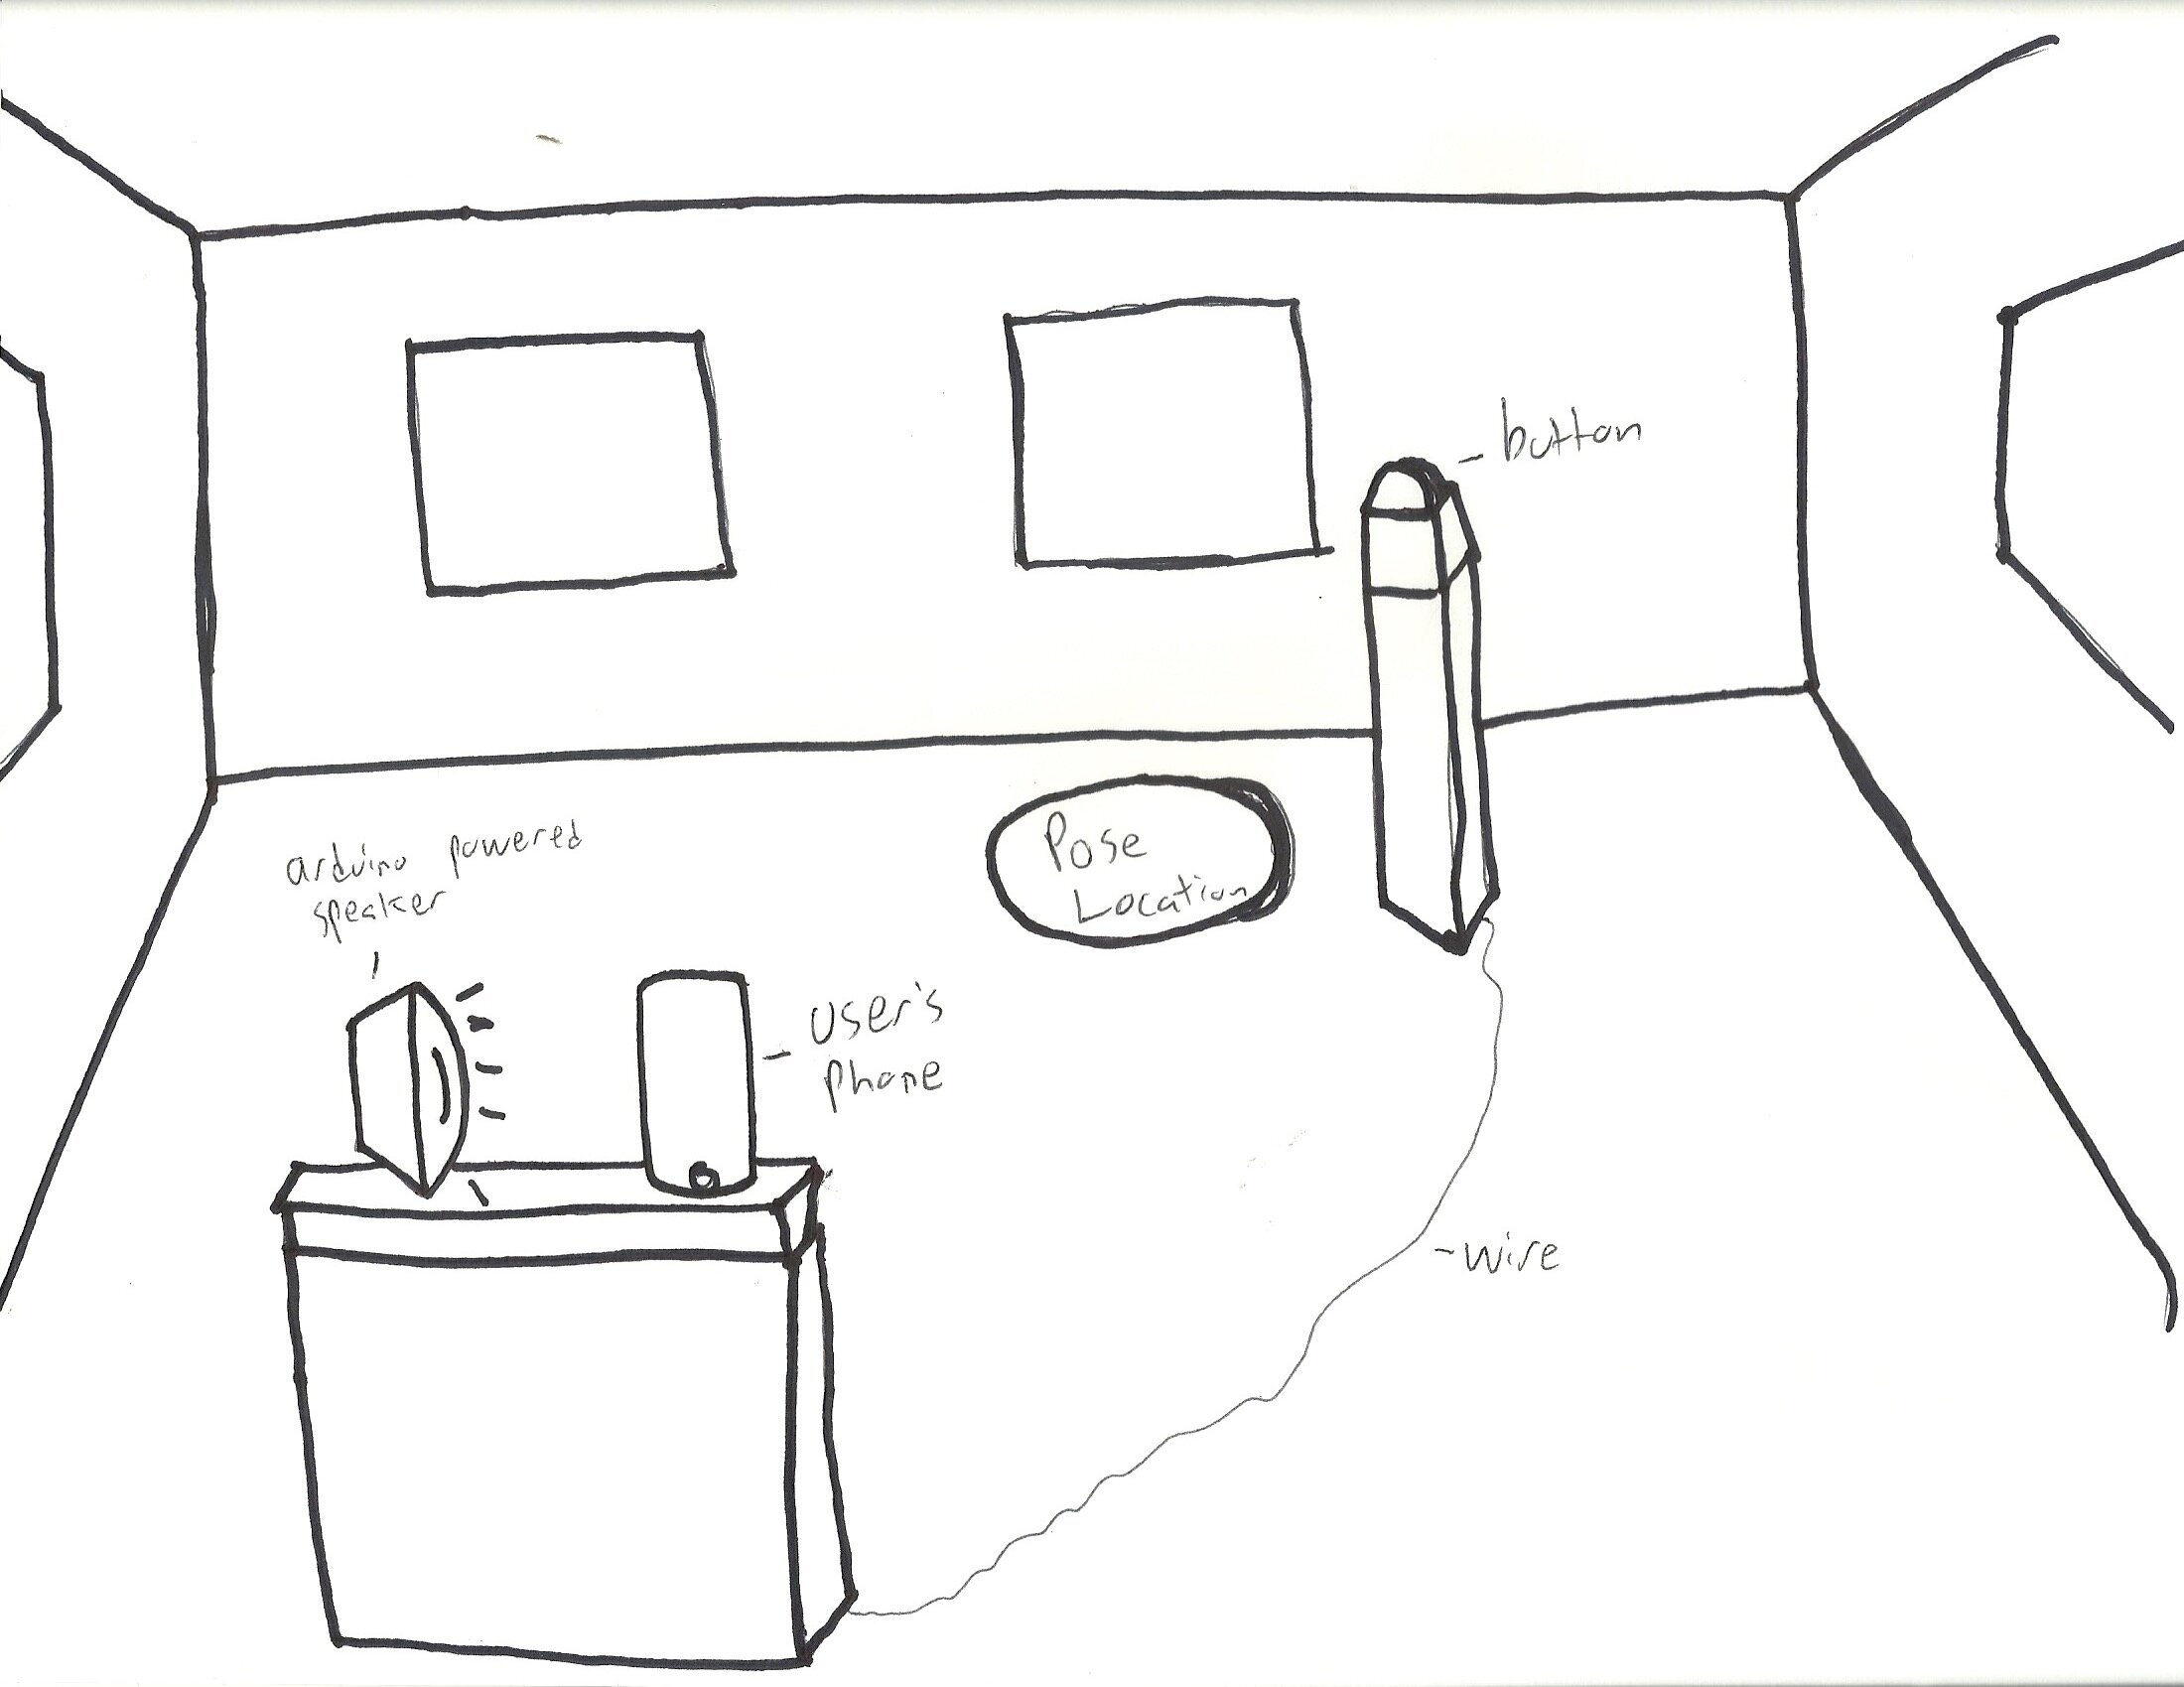
Gallery patrons would walk into a room and set their phone into a pre-placed holder. With a custom webpage open, they would angle said device to the set pose location in the room. They would then walk to this location and press a pre-placed button. This button would then take a photo on their phone.
Benefits
Patrons could use any phone with an internet connection. The system could reset with zero additional user interaction. Photo taking experience would remain seamless and with minimal instruction.
How
When the button is pressed an ultrasonic beacon will emit audio above the frequency range of human hearing. This will be heard by a webpage open on patrons phones.
Creation
The Web Page
The webpage utilized the P5.JS libraries for its core functionality. After a lot of self education I began to use the getEnergy() function. The function breaks down all incoming audio to individual frequency bands. This method then analyzes the bands and assigns each a value of loudness. A simple if -> then statement reacts if a certain frequency band’s loudness value goes above a determined level. When this occurs the page is triggered to take a photo.

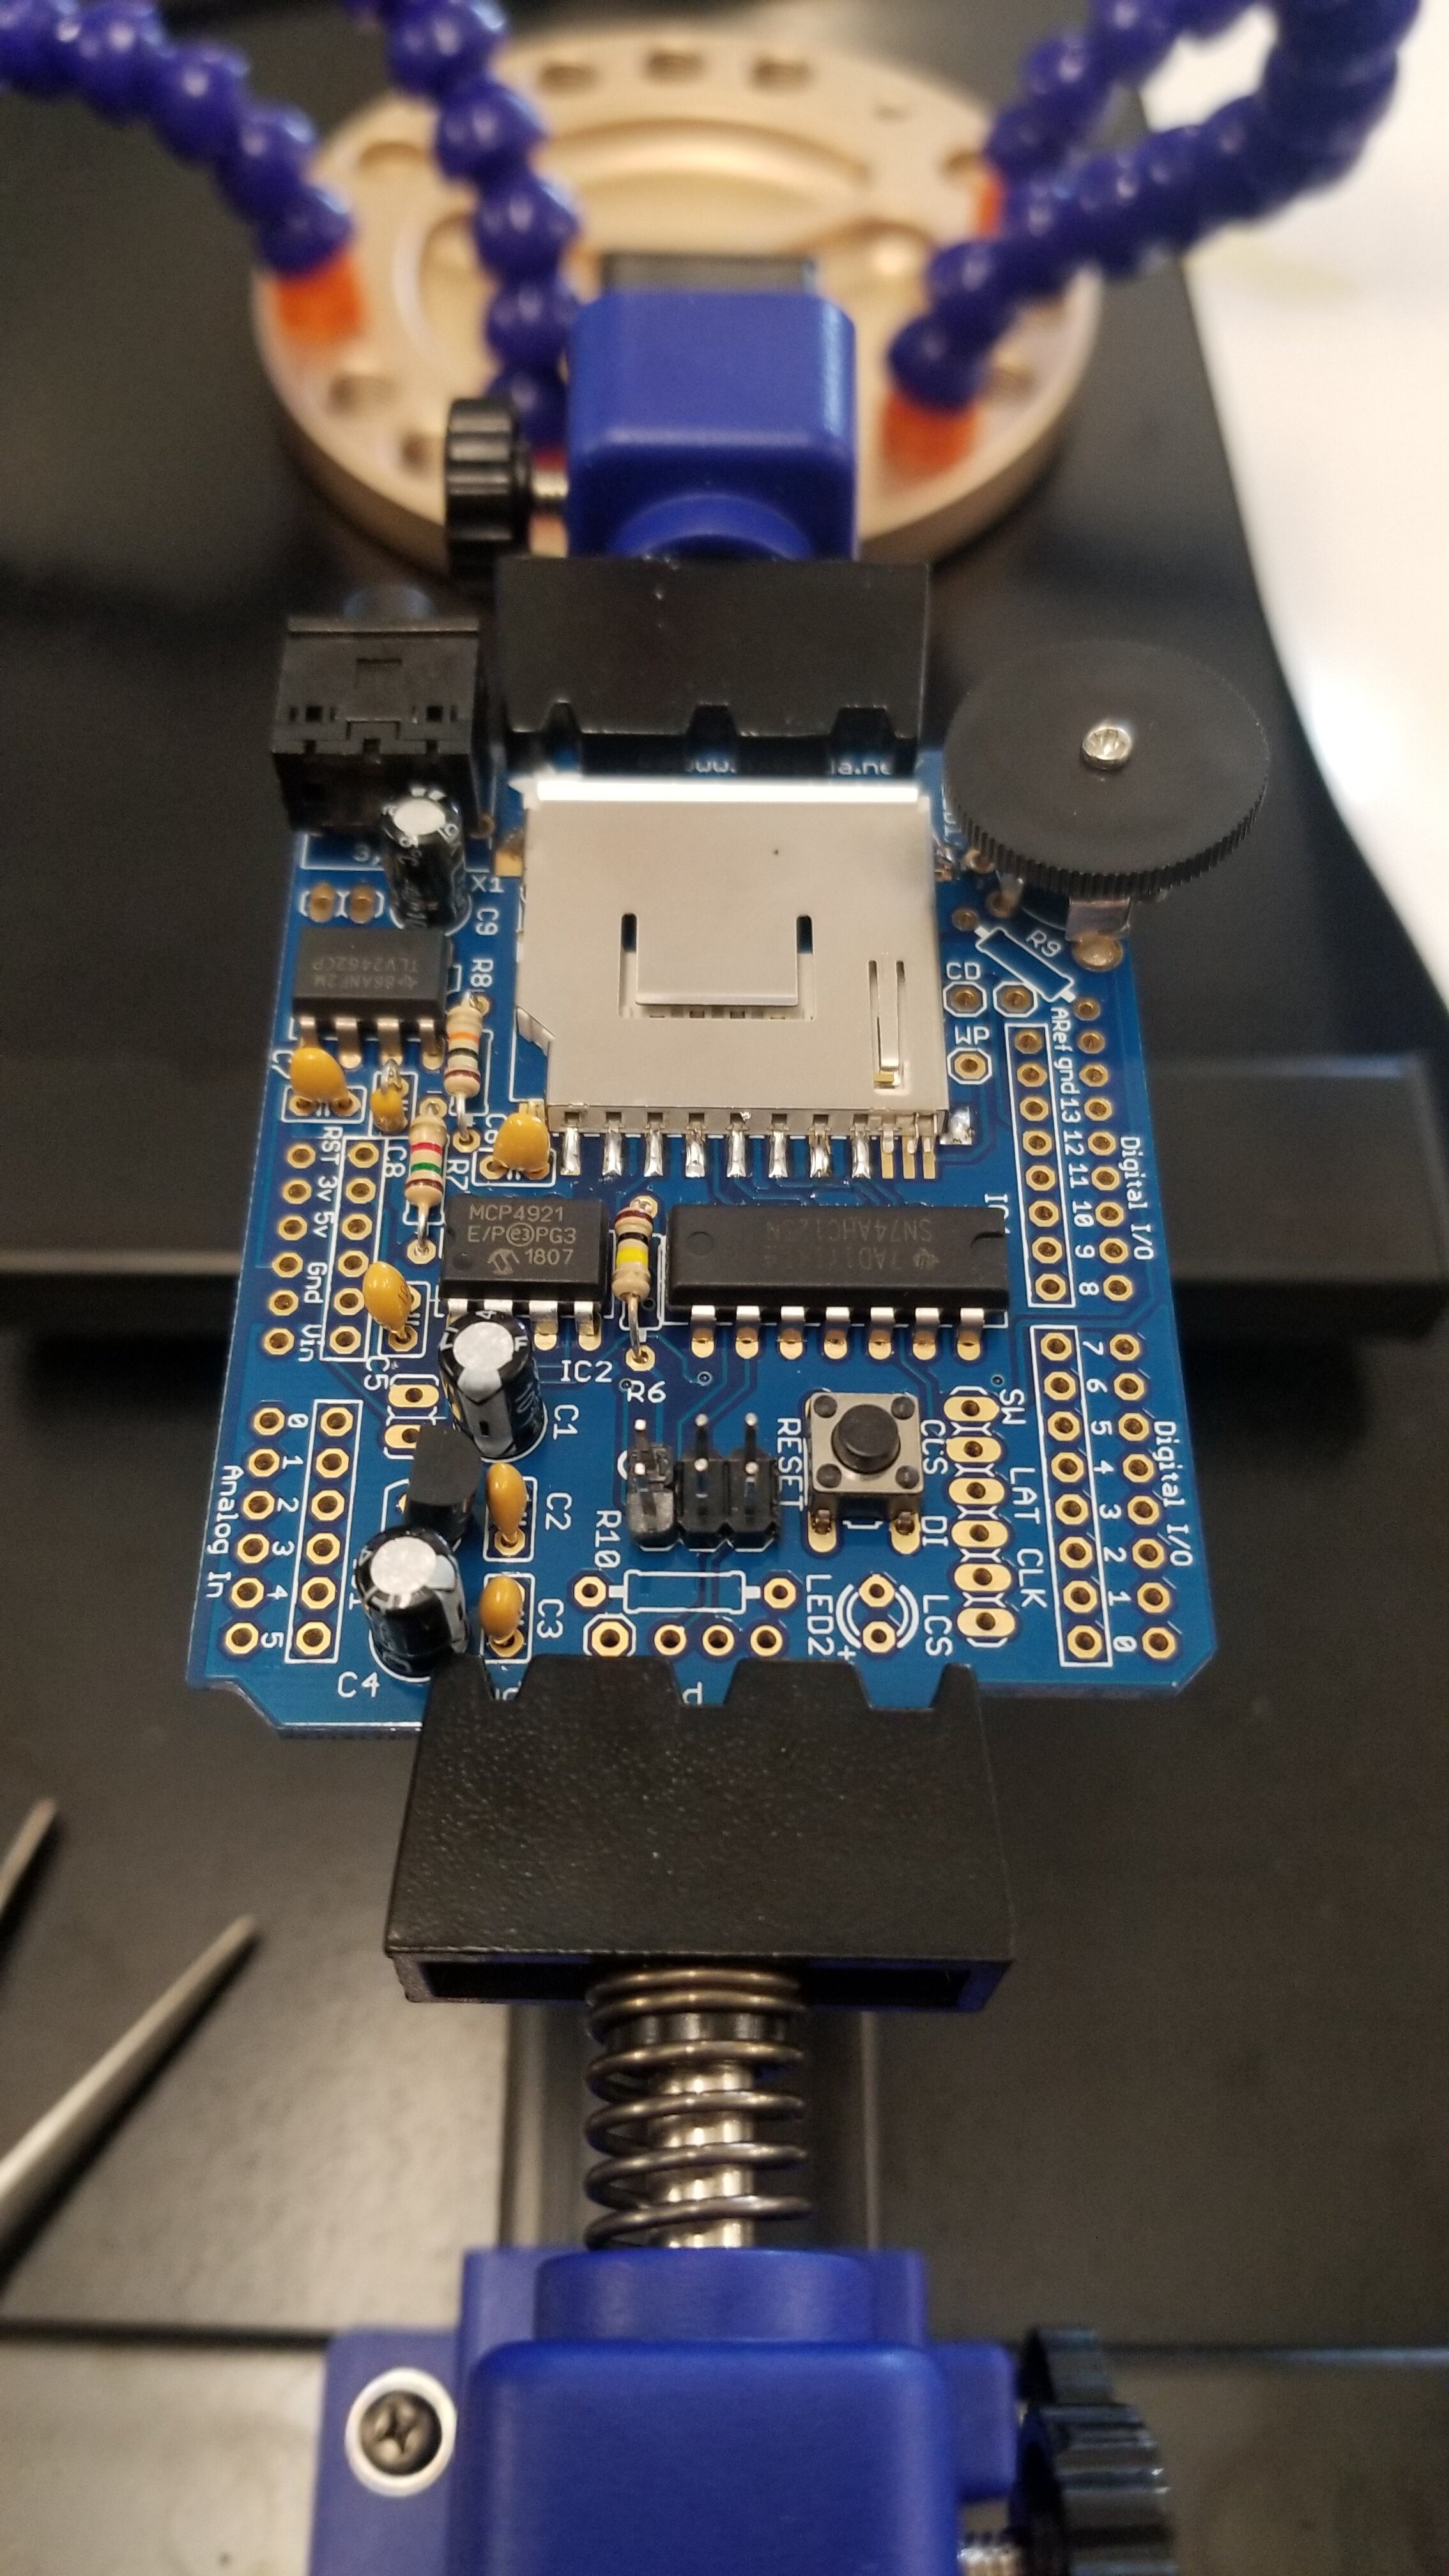
The Beacon
The beacon for this project was created using an Arduino UNO outfitted with an Adafruit Wave Shield for Audio. An audio sample containing the desired frequency was then loaded onto an SD card and placed inside the shield. A button was then wired into the beacon and set to trigger the audio sample to play. After pressing the button users have a brief 3 second window to pose before the audio sample is sent out a 3.5 mm jack to nearby speakers. The played audio signature is then heard by the listening webpage and prompts it to take a photo.


Hurdles
The first issue was the loop() speed of the webpage. Initially the page did not pause after taking each photo and would take 10 photos per second the beacon was playing. To solve this problem I used a for() loop with a built in delay. This triggers the page to pause listening and only takes a single photo. A second problem that arose came when initially testing the audio beacon.
At first I was simply generating a tone through the Arduino’s digital pins. Although this worked, the amperage through these pins was not high enough to create a sound discernible from outside audio interference. I needed to create an amplifier that my sound could run through. To solve this problem the above mentioned Adafruit shield and speakers with built in amplifiers were used.

So, does it work?
Heck yes it does!
The video below shows the view from the screen of a used device.
But I can hear it?
The speakers used for this project are traditional studio monitors which clip any audio above 18,500 HZ. Although this forced me to use an audible sound and not an ultrasonic signature as desired, the core functionality of both the beacon and webpage are sound, pun intended.
Reflections
Lessons Learned
Creating this project taught me an incredible amount. Although I went in with a working knowledge of Java-script and HTML, this project saw my knowledge grow exponentially. I had never worked with Arduinos in the past and loved the challenge they presented.
Next Steps
Since this project focussed mainly on the technical aspect, further product development and branding is needed. A second generation of beacon could be simplified and made more aesthetically pleasing. Scannable QR codes to launch the application could also be created to even further lower the burden of entry for patrons.
Source code for the webpage can be found here.